

The most useful hard surface modeling tips are habits that keep your model editable and your shading clean: block out big forms first, keep modifiers live, put the Mirror origin on the plane, apply scale before you bevel, keep Boolean cutters closed, bevel with a limit, and check normals. Below are ten, and each one is labeled as either backed by the Blender Manual (5.2 LTS) or general modeling logic.
That label matters. A tip that comes from the manual is a documented behavior. A tip labeled general logic is common practice that we think is sound, but no manual states it, so test it on your own model. For the full tool-by-tool workflow, read hard surface modeling in Blender.
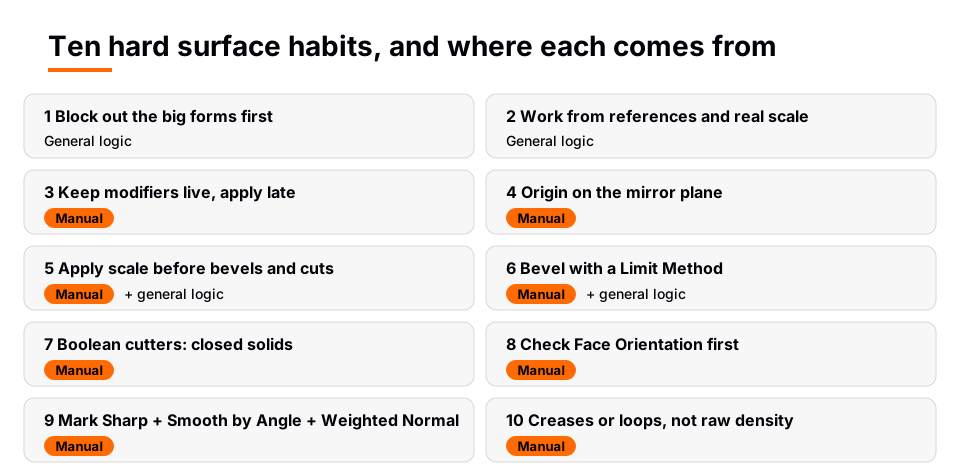
Plan and block out
1. Block out the big forms first
Source: general modeling logic. Build the overall silhouette from simple primitives and rough extrusions before adding any detail. Details added too early get in the way when you change a proportion. A blockout with correct proportions gives you something to measure every later cut against.
2. Work from references and real scale
Source: general modeling logic. Hard surface subjects are manufactured, so real proportions matter: panel gaps, bolt sizes and handle thickness all read as right or wrong. Collect reference images before you start, and set the object to a believable size so bevel widths later mean something.
Modifiers and transforms
3. Keep modifiers live and apply late
Source: Blender Manual. The manual describes modifiers as automatic operations that affect geometry in a non-destructive way, and says you can apply a modifier when you want its changes to be permanent (Blender Manual 5.2 LTS, Modifiers introduction). It also notes that applying a modifier that is not first in the stack ignores the stack order. So leave Mirror, Boolean and Bevel live while you design, and apply only when you are sure, for example before export or sculpting.
4. Put the object origin on the mirror plane
Source: Blender Manual. The Mirror modifier mirrors across the Object Origin. The manual's method for an exact plane is to select the edge, snap the 3D Cursor to the selection, and use Set Origin > Origin to 3D Cursor. An empty used as the Mirror Object is an alternative (Blender Manual 5.2 LTS, Mirror Modifier). Turn on Merge so vertices on the plane join, and use Clipping while editing so they cannot cross it.
5. Apply scale before you bevel or cut
Source: Blender Manual plus general logic. The manual says Object > Apply > Scale resets the scale to 1.0 while the geometry is adjusted so the object looks unchanged, and that applying transforms can affect how modifiers behave because they often depend on the object's transform values (Blender Manual 5.2 LTS, Apply). Our practical conclusion, which the manual does not state, is that a bevel width of 0.02 on an object with scale 1 is easier to predict than the same value on a stretched object. Apply scale early, then add modifiers.
Sources: Blender Manual 5.2 LTS, Modifiers introduction · Blender Manual 5.2 LTS, Mirror Modifier · Blender Manual 5.2 LTS, Apply
Bevels and cuts
6. Bevel with a limit method, not everywhere
Source: Blender Manual, plus general logic. The Bevel modifier's Limit Method can be None, Angle, Weight or Vertex Group. The manual says Angle is intended to bevel only the sharp edges of an object without affecting its smooth surfaces, and Weight uses the bevel weight you set in Edit Mode (Blender Manual 5.2 LTS, Bevel Modifier). Beveling every edge equally is general practice we would avoid: a consistent width on the main edges and none on hidden ones reads cleaner and costs less geometry. Our guide to how to bevel in Blender shows each setting. Raise Segments only until the highlight looks smooth.
7. Keep Boolean cutters closed and easy to see
Source: Blender Manual. The manual warns that only manifold meshes are guaranteed to give proper results, and that non-manifold meshes usually work but might give odd glitches. Make each cutter a closed solid. Its tip for seeing the cut is to enable Wireframe in Properties > Object > Viewport Display, and X-Ray to see inside objects (Blender Manual 5.2 LTS, Boolean Modifier). When a cut fails, work through Boolean not working in Blender. The settings are explained in the Blender Boolean modifier guide.
Sources: Blender Manual 5.2 LTS, Bevel Modifier · Blender Manual 5.2 LTS, Boolean Modifier
Shading and normals
8. Check face orientation before you blame the modifier
Source: Blender Manual. The manual says the Face Orientation overlay in the 3D Viewport is useful for quickly spotting faces that are oriented the wrong way, and that Mesh > Normals > Recalculate Outside (Shift+N) flips faces so they point outward (Blender Manual 5.2 LTS, Editing Normals). Odd Boolean and shading results often start here.
9. Combine Mark Sharp, Smooth by Angle and Weighted Normal
Source: Blender Manual. The manual says edges you mark Sharp in Edit Mode are not affected by the Smooth By Angle modifier or the Weighted Normal modifier, and that Weighted Normal's Keep Sharp option preserves Sharp edges. The Bevel modifier's Face Strength setting is designed to work with a following Weighted Normal modifier that has Face Influence on. Use Shade Auto Smooth to add Smooth By Angle, then add Weighted Normal if flat panels still look smeared.
10. Use creases or loops instead of raw density with Subdivision
Source: Blender Manual. The manual says Catmull-Clark subdivision rounds off edges, and often this is not what you want. It lists Weighted Edge Creases (Shift+E in Edit Mode) and extra edge loops as the ways to keep edges firm, and warns that higher subdivision levels use more memory (Blender Manual 5.2 LTS, Subdivision Surface Modifier). Keep the Viewport level low and the Render level higher.
Sources: Blender Manual 5.2 LTS, Editing Normals · Blender Manual 5.2 LTS, Subdivision Surface Modifier
Mistakes that undo the tips
- Applying every modifier early. You lose the ability to change widths and cuts. Apply last.
- Cutting before the proportions are right. Undoing a Boolean-heavy mesh is slower than moving a blockout.
- Chasing shading errors with more geometry. Dark smears are usually a normals problem, not a density problem.
- Forgetting hidden cutters. Keep cutters in their own collection so they do not end up in the render or export.
All four are general modeling logic. If the term itself is new to you, start with what hard surface modeling is.
Learn this in order with The Blender Launchpad
Tips are easier to use when you have seen the whole workflow once. The Blender Launchpad is a members app with a roadmap of hand picked, free YouTube lessons in six stages. Stage 2 is hard surface modeling, and it follows a first stage that assumes you have never opened Blender.
It is a curated playbook, not original video lessons, so you spend your time watching in a good order instead of searching for the next video. It is one payment with no subscription.
Questions people also ask
What is the most useful hard surface modeling tip?
Keep your modifiers live and apply them last. It keeps bevels, cuts and mirrors editable, so a change in proportion does not mean starting over.
Why does my hard surface model look dirty or smeared?
Smooth shading is blending normals across flat panels. Add the Smooth By Angle modifier, mark Sharp edges, and try Weighted Normal. Also check face orientation for flipped faces.
How many bevel segments should I use?
The manual does not give a number. Segments is the number of edge loops added along the bevel and higher values are smoother, so raise it only until the highlight looks right.
Should I always use Subdivision Surface for hard surface models?
No. The manual says Catmull-Clark rounds off edges, which hard surface work often does not want. Use it for curved forms and control edges with creases or loops.
How we checked this
We read these Blender Manual (5.2 LTS) pages on November 4, 2026: Modifiers Introduction, Mirror, Boolean, Bevel, Weighted Normal, Smooth By Angle and Subdivision Surface modifiers, Apply, Editing Normals, Edge Data (Mark/Clear Sharp) and Shading. We did not run Blender while writing this. Tips 1, 2, the application of tip 5 to bevel widths, the "avoid beveling everything" advice in tip 6, and the list of common mistakes are general modeling logic, not statements from the manual.


