
To add an HDRI in Blender, open the Shader Editor, set Shader Type to World, add an Environment Texture node, click Open to load a .hdr or .exr file, and connect its Color output to the Color input of the Background node. Switch the viewport to Rendered and the HDRI lights your scene.
This is the short version, written to be followed with the file already downloaded. For the longer guide with file formats, hiding the background and noise fixes, read our full Blender HDRI guide. Steps follow the Blender 5.2 LTS manual.
How to add an HDRI in Blender: the six steps
- Open the Shader Editor. Change any area to the Shader Editor, or switch to the Shading workspace.
- Set Shader Type to World. In the editor header, open the Shader Type dropdown and choose World. The manual says this edits the shader nodes of the World background instead of the active object's material. You should see a Background node feeding a World Output node.
- Add an Environment Texture node. Press Shift+A to open the Add menu, find Environment Texture and click to place it. The manual also notes a shortcut: dragging an image file into the Shader Editor while you edit the World creates this node for you.
- Load the image. Click Open on the node and choose your .hdr or .exr file. Leave Projection Method on Equirectangular, the format of a typical HDRI. Mirror Ball is for photos of mirror balls.
- Connect the nodes. Drag from the Color output of the Environment Texture node to the Color input of the Background node. The manual says the Background node is the only shader the world surface accepts, and that its Strength sets how intense the light is.
- Check it in the viewport. Press Z to open the shading pie menu and choose Rendered. You should see the sky behind your objects, with light and reflections from the HDRI on them.
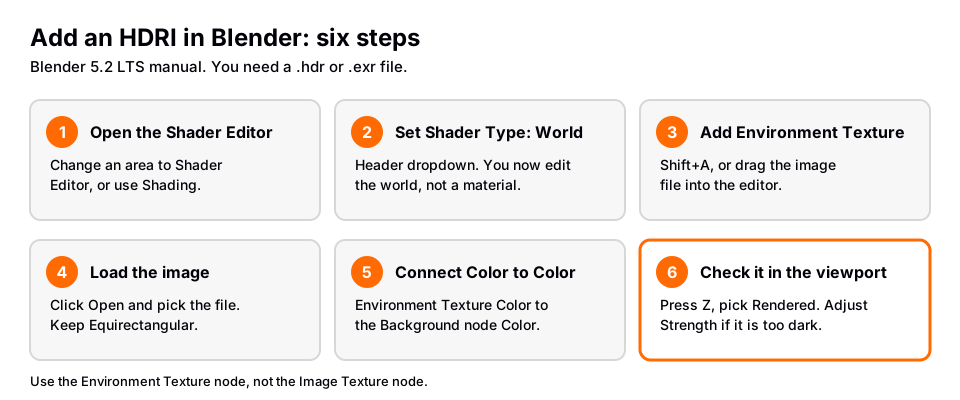
Use the Environment Texture node, not the Image Texture node. The manual says it maps the image correctly for image-based lighting. With nothing connected to its Vector input, the image is mapped as an environment with the Z axis as up.
Use an HDRI in Blender: what you get once it is added
The manual describes the world as rendered as if it were very distant from the scene, so objects do not interact with it. The light only comes in. That is why one image gives you the sky color, the direction of the sun, the shadows and the reflections at once.
If the scene is too dark or too bright, change Strength on the Background node. If the sun is in the wrong place, turn the HDRI rather than moving your objects: see how to rotate an HDRI in Blender. If the shadows are softer or harder than you want, see HDRI shadows in Blender.
Add an HDRI to the viewport only
If you just want to judge a model or material under different lighting, you can skip the world entirely. In the 3D Viewport, choose Material Preview, open the shading popover and switch Scene World off. A world is then built from the options below it: HDRI Environment, Rotation, World Space Lighting, Strength, World Opacity and Blur.
The manual describes the Preferences Lights section as the place with an HDRIs panel that manages the HDRI image files used to light the view in Material Preview or Rendered shading. These settings are for the viewport. Your final render still needs the Environment Texture node from the steps above, and with Scene World on, Material Preview uses your world.
If the HDRI does not show up
- Nothing changed. The Shader Type is still on Object, or the Color output is not connected to the Background node's Color input.
- The viewport looks the same in Material Preview. Scene World is off, so Blender is using the viewport HDRI instead of yours. Switch it on, or use Rendered.
- The image looks wrapped or stretched. The file is probably not an equirectangular image, or Projection Method is wrong for it.
- The lighting looks flat. Check the file type. A JPEG is 8 bit and cannot store a sun that is brighter than white, so use .hdr or .exr. Where to find good files is covered in free HDRIs for Blender.
Skip the guesswork with the Material & Lighting Vault
An HDRI is one lighting condition per file. The Material & Lighting Vault is a Blender 5.2+ extension that builds the lighting from your objects instead. Select them, pick one of its 200 lighting setups (19 categories, tuned for Cycles) and it measures the objects and builds itself around them. It also has 267 studio lights, including softboxes, beam profiles, gobos and colored light textures, so you can add a shaped light next to your HDRI.
It lives in the Metalight tab in the N panel, with 1,690 procedural materials and 67 weathering presets alongside. The license covers personal and commercial use. It is a tool, not a course. If you want the whole lighting and rendering process in order, The Blender Launchpad is a curated roadmap of free YouTube lessons with a stage on studio lighting and rendering, and its bonuses include 1,000+ CC0 assets, HDRIs and textures free for commercial use.
Questions people also ask
How do I use an HDRI in Blender?
Load it in the World shader: add an Environment Texture node, open the .hdr or .exr file and connect Color to the Background node's Color. Press Z and choose Rendered to see the lighting.
How do I add an HDRI in Blender without nodes?
For the viewport only, use Material Preview, switch Scene World off and pick an HDRI Environment in the shading popover. For the final render, the Environment Texture node is how the manual says to do it.
Which file types work for an HDRI in Blender?
Use .hdr (Radiance HDR) or .exr (OpenEXR). Both store float data, so bright sources stay bright. A JPEG is 8 bit.
Why is my Blender add HDRI step not changing the lighting?
Check that Shader Type is set to World and that the Environment Texture's Color is connected to the Background node's Color. Also check that the viewport is in Rendered, or in Material Preview with Scene World on.
How we checked this
We did not run Blender for this guide. We read these pages on November 4, 2026, and wrote only what they confirm:
- Blender Manual (5.2 LTS), read November 4, 2026: Shader Editor, Environment Texture node, Background node, World Output node, World lights, Viewport Shading, Preferences (Lights), Supported Image Formats and Node Editors (Add menu).
The manual's pages do not give the exact submenu path for Environment Texture in the Add menu, so we describe it by name. We could not confirm differences between Blender 4.x and 5.x for these steps.


