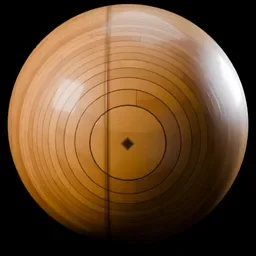
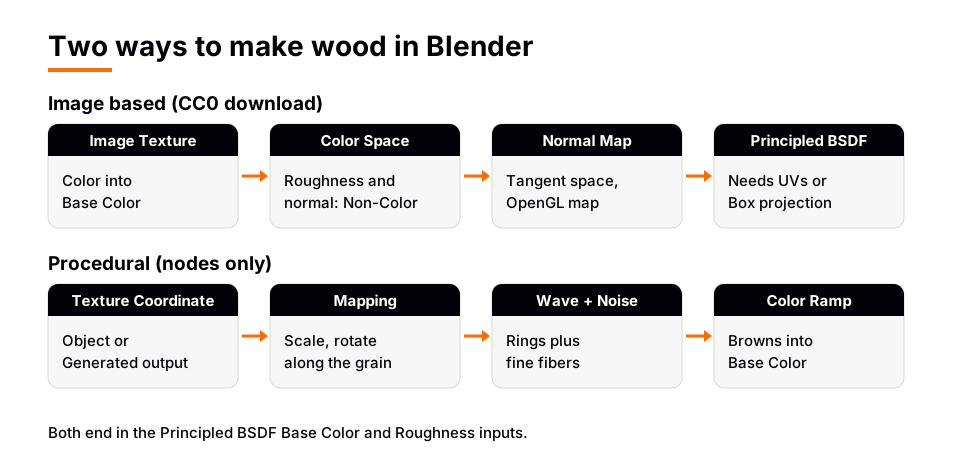
You can make a wood texture in Blender two ways. For an image-based wood texture, download a CC0 wood material from Poly Haven or ambientCG and connect its color, roughness and normal images to the Principled BSDF. For a procedural wood texture, drive a Color Ramp from a Wave Texture in Rings mode, add a stretched Noise Texture for fine grain, and place both with a Mapping node.
This guide covers both methods step by step in Blender 5.2 LTS, with the node names and properties the manual lists. It also compares them and covers why wood often looks like plastic or looks stretched.
Method 1: an image-based wood texture
An image-based texture uses photographed or scanned wood, so it gives real knots, pores and color variation with the least effort. It is the fastest route to a believable result when you have UVs on the object.
Where to get free wood textures
- Poly Haven. Its license page (read November 4, 2026) says all its assets are CC0, that you can use them for any purpose including commercial work, that credit is not required and that you can redistribute them. Poly Haven's public asset list showed 138 textures in its Wood category on that date. Its wood textures page lists them. For one example, American Walnut Veneer, the file list included Diffuse, Rough, AO and Displacement maps, normal maps in OpenGL and DirectX form, a .blend file, and 1k to 8k resolutions.
- ambientCG. Its license page (read November 4, 2026) says all assets are provided under the Creative Commons CC0 1.0 Universal License, that commercial use is allowed and that credit is appreciated but not required. Wood materials are listed in its Wood category.
Our guide to free Blender textures lists more sources.
Set it up in the Shader Editor
- Select the object and open the Shading workspace. Make sure the object has a material, and that the viewport is in Material Preview so you can see the result.
- Add an Image Texture node from the Add menu, click Open, and load the wood color image (often named Diffuse or Color). Connect its Color output to the Principled BSDF Base Color.
- Add a second Image Texture node for the roughness image. Set its Color Space to Non-Color and connect its Color output to Roughness. The manual's Normal Map page states the Non-Color rule for normal maps, and the same reasoning applies to other data maps.
- Add a third Image Texture node for the normal image, again with Color Space set to Non-Color. Add a Normal Map node, connect the image Color output to the node's Color input and its Normal output to the Principled BSDF Normal.
On the Normal Map node, keep Space on Tangent for a normal map made for UVs. The manual says Blender uses the OpenGL convention by default, where the green channel's Y axis points up, and that the DirectX convention is for normal maps from other software. If a Poly Haven download lists both, pick the OpenGL one and the bumps will light the right way.
Scale and rotate the grain
If the Image Texture node's Vector input is unconnected, the manual says the coordinate is taken from the object's active UV map. To change the grain size or direction, add a Texture Coordinate node (UV output) and a Mapping node, then connect Mapping's Vector output to the Vector input of all three Image Texture nodes. Use one Mapping for all three so the maps stay aligned.
Set the Mapping node's Vector Type to Texture. The manual explains that the Point type moves and scales the coordinates, so the texture appears to move and scale the opposite way, while the Texture type transforms the texture itself. Raising Scale then makes the wood larger, and rotating the Z value turns the grain across the object.
If the object has no UVs, set the Image Texture's Projection to Box and raise Blend for smoother transitions between sides, as the manual describes, and use the Object output of the Texture Coordinate node. If the grain looks stretched on a UV-mapped mesh, the UVs are the cause. Our guide on how to UV map in Blender shows how to fix them.
Sources: license page · wood textures page · license page · Wood category
Method 2: a procedural wood texture
A procedural wood texture is built from nodes, so it has no image to download, needs no UVs, and you can change its colors and ring spacing at any time. The trade-off is more node work to match a scan. The recipe below uses only nodes the manual documents.
Build the grain
- Coordinates. Add a Texture Coordinate node and use its Object output. The manual says Object uses an object as a source for coordinates, so the pattern stays fixed to the object. If you leave a texture's Vector input empty, the Wave and Noise nodes use the Generated coordinates instead, which range from 0.0 to 1.0 over the object's bounding box.
- Mapping. Add a Mapping node, set Vector Type to Texture, and connect Texture Coordinate to its Vector input. Stretch the grain by scaling the Mapping node along one axis. Long, narrow grain comes from a Scale that differs between axes.
- Wave Texture. Add a Wave Texture, set Type to Rings, and connect the Mapping output to its Vector input. The manual says the node adds procedural bands or rings with noise distortion. Use Rings Direction to pick the axis the rings run from: try X, Y and Z until the rings sit around the length of the board. Set Wave Profile to Sine for soft rings or Saw for sharper ones.
- Make the rings wobble. Raise Distortion so the rings stop looking perfectly round, and use Detail, Detail Scale and Roughness to shape that distortion. The manual says these correspond to the inputs on the Noise Texture node. Scale sets how many rings appear.
- Color Ramp. Add a Color Ramp and connect the Wave Texture's Factor output to its Factor input. The manual says 0.0 gives the leftmost color and 1.0 the rightmost. Click the left stop and choose a dark brown, then the right stop and choose a lighter tan. Ctrl+click on the ramp adds another stop for a mid tone.
- Connect. Connect the Color Ramp's Color output to the Principled BSDF Base Color.
Add fine fibers and roughness
Rings alone look too clean. Real wood has fine fibers that run along the grain, and a surface that is not equally shiny everywhere.
- Fine fibers. Add a Noise Texture with a high Scale. Give it its own Mapping node with a very different scale along the grain axis than across it, so the noise stretches into streaks. Mix it into the color with a Mix node (Data Type set to Color, and a blend mode such as Multiply or Overlay, both listed in the manual) and keep the Factor low so it adds texture without hiding the rings.
- Roughness. Connect the same ring values through a second Color Ramp with two gray stops into Roughness, so the lighter and darker parts of the grain reflect differently.
- Bump. Connect the fine fiber noise to the Height input of a Bump node and its Normal output to the Principled BSDF Normal. Strength controls the effect.
The Noise Texture node in the 5.2 manual has a Type menu (fBM, Multifractal, Hybrid Multifractal, Ridged Multifractal, Hetero Terrain), so one node covers fractal patterns of that kind. Our Musgrave texture in Blender guide goes deeper on those types. Higher Noise Dimensions mean higher render time, per the manual, so use the lowest that looks right.
Fix common procedural problems
- Visible bands or stripes. The manual says that a slightly tilted flat surface can show banding in Noise, and that rotating the coordinates by an arbitrary amount mitigates it. Rotate the Mapping node by a small angle.
- Stretched pattern. Object coordinates are in the object's own space, so unequal scale values stretch the pattern. Apply the scale (Ctrl+A, then Scale).
- Rings are centered in the wrong place. Change the Location values on the Mapping node to shift where the rings sit relative to the object.
Image or procedural: which to use
| Question | Image-based | Procedural |
|---|---|---|
| Needs UVs? | Yes by default, or use Box projection | No, uses Object or Generated coordinates |
| Realism for close-ups | High, depends on image resolution | Depends on your node setup |
| Change colors and spacing | Limited without extra nodes | Direct, through ramp and Wave settings |
| Setup time | Short once downloaded | Longer |
| Extra files | Several image maps | None |
A common choice is images for hero objects seen up close and procedural wood for background items or quick drafts. Our guide to building a Blender material library shows how to save the wood you like for reuse.
Skip the node wiring with the Material & Lighting Vault
Wiring Wave, Noise, Mapping and Color Ramp nodes for each species and finish takes time. The Material & Lighting Vault is a Blender 5.2+ extension (the Metalight tab in the N panel) with 1,690 procedural materials: 1,000 core materials in 32 categories plus 690 Pro. The Vault's catalog lists 45 materials in its Wood category, split into Raw Species, Floor Planks, Painted & Stained, Plywood & MDF, Weathered & Driftwood, and Bamboo & Cork.
The materials work in Cycles and EEVEE and need no UVs, using object coordinates by default (a Use UV option exists). They total about 64 MB. For aged wood, 67 weathering presets (rust, moss, snow, soot, cracks, edge wear) work on any material, including a wood material you built yourself in this guide.
The license covers personal and commercial use, without redistribution. It is a tool, not a course.
Questions people also ask
How do I make a wood texture in Blender?
Either connect a downloaded wood color, roughness and normal image to the Principled BSDF, or build one from a Wave Texture set to Rings, a Noise Texture, a Mapping node and a Color Ramp. Both end at Base Color and Roughness.
Is Poly Haven wood free for commercial use?
Poly Haven's license page, read November 4, 2026, says its assets are CC0 and can be used for any purpose including commercial work, with no credit required.
Can I make wood in Blender without UV mapping?
Yes. A procedural wood texture can use the Object or Generated texture coordinates, and an Image Texture can use Box projection. Both avoid needing a UV map.
Why does my wood texture look like plastic?
Usually the Roughness is a single flat value, so every part reflects the same. Use a roughness image or vary it with a Color Ramp, and add a normal or Bump input for grain detail.
How we checked this
We read these pages on November 4, 2026: Blender Manual (5.2 LTS) Image Texture node, Normal Map node, Mapping node, Texture Coordinate node, Wave Texture node, Noise Texture node, Color Ramp node and widget, Mix node, Bump node and Principled BSDF; the Poly Haven license page and its public asset and file lists; and the ambientCG license page. We did not run Blender while writing this. The Non-Color advice for roughness maps, the Rings Direction axis choice, the stretched fiber tip, the Mix blend mode choice and the image versus procedural table are general guidance, not statements from the manual, so adjust them to your scene.