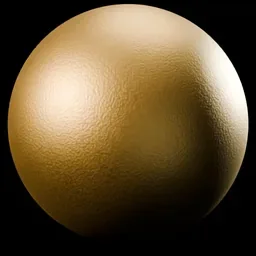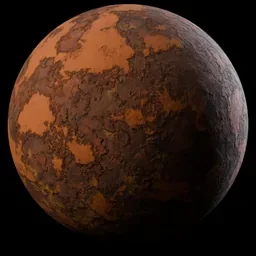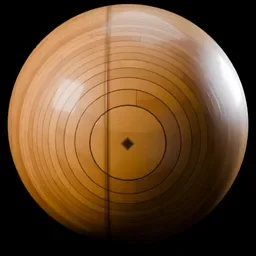
To make a metal material in Blender, select the Principled BSDF node, set Metallic to 1.0, choose a Base Color for the metal, and set Roughness. The manual says Roughness 0.0 gives a perfectly sharp reflection, and higher values spread it out. A mirror-like chrome look uses 0.0; most other metal finishes use a higher value.
This guide covers the full Blender metal material setup, a steel material, gold and copper with the dedicated Metallic BSDF node, brushed metal with anisotropy, and why metal often looks black or flat. It follows the Blender 5.2 LTS manual and states where Cycles and EEVEE differ.
How to make a metal material in Blender
- Select the object, open the Material Properties tab and click New if it has no material.
- Open the Shading workspace. Its Shader Editor shows the Principled BSDF, and its 3D Viewport can use Material Preview or Rendered shading.
- Set Metallic to 1.0. The manual says Metallic blends between a dielectric and a metallic model. At 1.0 you get a fully specular reflection tinted with the base color, without diffuse reflection or transmission.
- Pick the Base Color. For metal, this is the reflection color. The manual says Base Color is used for diffuse, subsurface, metal and transmission.
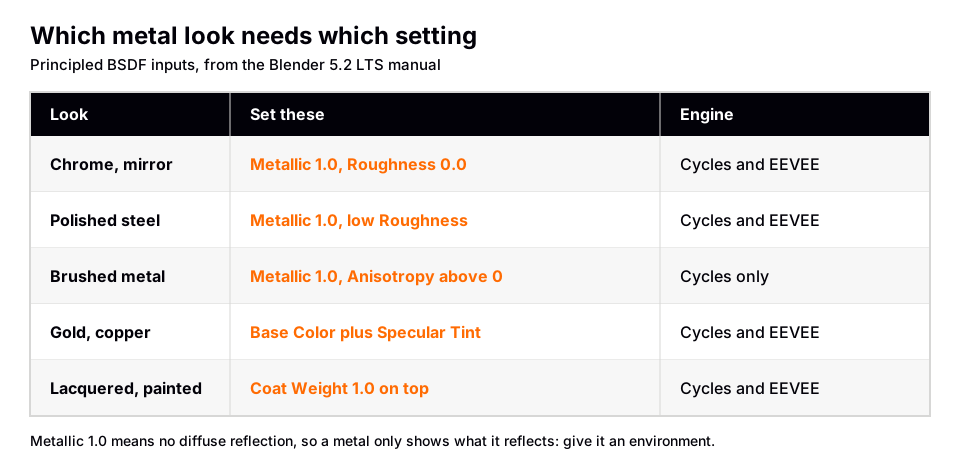
- Set Roughness. 0.0 is a mirror finish. Higher values blur the reflection. For brushed or worn metal you want a middle value, not 0.
- Give it something to reflect. Because Metallic 1.0 removes the diffuse part, a metal object only shows what it reflects. In an empty world it looks black. Add an HDRI, as in how to use an HDRI in Blender, or lights.
You should now see a shiny object that picks up the colors around it. If it is still dark, step 6 is almost always the cause.
What the Metallic value means
People often search for a "metallic material" and expect a single switch. In the Principled BSDF it is a blend. The manual describes Metallic as blending between a dielectric (0.0) and a metal (1.0). At 0.0 the material has a diffuse or transmissive base with a specular reflection layer on top. The manual also says the metal component is opaque and only reflects light.
Real surfaces are usually one or the other, so use 0 or 1 for most materials. Values between those two make sense where a map decides it per pixel, for example paint over bare metal, or a rust texture. For maps, load the metallic image with Color Space set to Non-Color; our guide to adding a texture in Blender shows the wiring.
Steel material in Blender
Steel is a metal with a fairly neutral, gray reflection. Start with the same setup as above: Metallic 1.0, a mid to light gray Base Color, and a Roughness above zero. Polished steel uses a low Roughness. Cast or machined steel uses more.
The manual does not list steel values, so we give no color numbers for it. If you want a measured result, the Metallic BSDF node has a Physical Conductor mode that takes real IOR and Extinction values per color channel. The manual points to two sources for those values: the Physically Based database for CG artists and the Refractive Index nk database. Look steel up there rather than trusting a guess.
Gold, copper and aluminum: the Metallic BSDF node
The Blender 5.2 manual lists a dedicated Metallic BSDF node, described as the node used to recreate the appearance of metals. It has two Fresnel Type options.
- F82 Tint. You set a Base Color (the color seen straight on) and an Edge Tint (the color seen at an 82 degree angle). The manual says this allows artist-friendly control of the color near the edge, to simulate a complex IOR.
- Physical Conductor. You enter IOR and Extinction per color channel, the real and imaginary parts of a complex refractive index.
The manual includes example F82 values. These are copied from the Metallic BSDF page; the default is titanium.
| Metal (manual example) | Base Color (RGB) | Edge Tint (RGB) |
|---|---|---|
| Titanium (default) | 0.617, 0.576, 0.540 | 0.695, 0.726, 0.770 |
| Aluminum | 0.911, 0.912, 0.917 | 0.848, 0.877, 0.916 |
| Copper | 0.972, 0.694, 0.486 | 0.961, 0.969, 0.942 |
| Gold | 1.000, 0.735, 0.353 | 0.993, 1.000, 1.000 |
The Principled BSDF can do a similar job. Its Specular panel has a Tint input, which the manual says tints the edges of metallic materials to simulate the complex IOR found in materials such as gold or copper. For more on gold, see the gold texture guide.
Brushed metal in Blender
Brushed metal has stretched highlights, which come from anisotropy. In the Principled BSDF, the Specular panel has Anisotropy, Anisotropic Rotation and Tangent inputs. The manual says higher Anisotropy values give elongated highlights along the tangent direction, and Rotation turns that direction (1.0 is a full circle).
- Set Metallic to 1.0 and a mid Roughness.
- Raise Anisotropy above 0. The manual labels this input and the rotation as Cycles only.
- Use Anisotropic Rotation or the Tangent input to point the stretch along the brushing direction.
One catch from the manual: the Principled BSDF's rotation is turned 90 degrees compared to the Glossy BSDF node. Add 0.25 to the value to match. The Glossy BSDF page also words the direction the other way round (elongated orthogonal to the tangent), so if the stretch runs the wrong way, rotate it.
The manual marks the anisotropy inputs as Cycles only, so a true anisotropic brushed look needs Cycles. As a fallback, you can vary Roughness with a stretched Noise Texture. That is our suggestion, not a manual recipe, and it gives a different look from true anisotropic highlights.
Polished, lacquered and car-paint metal
The Principled BSDF has a Coat panel for lacquer or car paint. The manual says coat is a layer on top of the other materials, with its own Weight, Roughness, IOR, Tint and Normal. The Normal input is useful for a smooth coat over a rough metal below. Set Coat Weight to 1.0 for full effect. The manual notes the weight should typically be 0 or 1 for physically based materials.
The Glossy BSDF node, which the manual says is used for materials such as metal or mirrors, is a simpler single-layer alternative. It has Color, Roughness, Anisotropy (Cycles only), Rotation, Normal and Tangent. The Principled and Metallic BSDF nodes cover the same ground with more control.
Metal in EEVEE versus Cycles
Metal is all reflection, so it exposes the differences between the engines. The manual lists these limits for EEVEE.
- Anisotropy and Thin Film are Cycles only.
- Screen-Trace raytracing only knows what is in the view, using the depth buffer. Reflections disappear near the screen border, and objects behind others are not considered. The Light Probe method relies on manually placed probes.
- Light probe capture does not support specular reflections; the manual says specular energy is treated as diffuse there.
- All BSDFs use approximations in EEVEE, so small differences from Cycles will always exist.
- Fast GI Approximation takes over for high roughness. Its Threshold sets the maximum roughness a BSDF can have to use ray tracing, and rougher BSDFs progressively use the approximation.
For a hero shot of polished metal, Cycles gives the most accurate reflections. For quick turntables, EEVEE is faster; see EEVEE vs Cycles. The Multiscatter GGX setting on the Distribution list takes multiple scattering between microfacets into account, which the manual says avoids excessive darkening on rough metal.
Why your metal looks black, flat or plastic
- Black metal. Nothing to reflect. Add an HDRI or lights. Metallic 1.0 has no diffuse light to fall back on.
- Flat gray blob. The environment is uniform, or Roughness is too high. Lower Roughness, or use a world with brighter and darker areas.
- It looks like plastic. Metallic is still 0, or set too low. A dielectric has a diffuse base layer, which reads as plastic.
- Colored edges look wrong. Check Specular Tint (Principled) or Edge Tint (Metallic BSDF).
- Reflections vanish in EEVEE. The ray left the screen, or the probe is missing. Try the other raytracing Method or switch to Cycles.
- The texture looks too bright or too dark. A metallic or roughness map is on the wrong color space. Use Non-Color for data maps.
If the material is not showing at all, start with Blender material basics.
Skip the node wiring with the Material & Lighting Vault
Dialing in steel, chrome or brushed metal by hand means finding the right inputs, then a texture and a roughness pattern. The Material & Lighting Vault is a Blender 5.2+ extension (the Metalight tab in the N panel) with 1,690 procedural materials: 1,000 core materials in 32 categories plus 690 Pro. Categories include steel and glass, among many others.
The materials work in Cycles and EEVEE and need no UVs, using object coordinates by default (a Use UV option exists). They total about 64 MB. For worn metal, 67 weathering presets (rust, moss, snow, soot, cracks, edge wear) work on any material, including the metal you built yourself above. There are also 267 studio lights, including softboxes and beam profiles, which help metal because metal only shows what it reflects.
The license covers personal and commercial use, without redistribution. It is a tool, not a course.
Questions people also ask
How do I make a metal material in Blender?
Set the Principled BSDF Metallic to 1.0, choose a Base Color, and set Roughness. Add an HDRI or lights so the metal has something to reflect.
How do I make a steel material in Blender?
Use Metallic 1.0 with a neutral gray Base Color and a Roughness above zero. The manual lists no steel values, so for measured accuracy use the Metallic BSDF node's Physical Conductor mode with data from a source such as the Refractive Index nk database.
What does the Metallic setting do in Blender?
It blends between a dielectric at 0.0 and a metal at 1.0. At 1.0 the surface is a fully specular reflection tinted by the Base Color, with no diffuse reflection or transmission.
Why is my Blender metal material black?
Metal reflects its surroundings, so with an empty world there is nothing to show. Add an HDRI environment or lights, and check that Metallic is 1.0.
How do I make brushed metal in Blender?
Raise the Anisotropy input on the Principled BSDF and use Anisotropic Rotation or Tangent to aim it. The manual says anisotropy is Cycles only.
How we checked this
We did not run Blender for this guide. We read these pages on November 4, 2026, and wrote only what they confirm:
- Blender Manual (5.2 LTS), read November 4, 2026: Principled BSDF, Metallic BSDF, Glossy BSDF, EEVEE Raytracing, EEVEE Limitations and Materials introduction.
The F82 values in the table are the manual's own examples. We did not read the two databases the manual names, so we quote no steel or chrome numbers. We also could not confirm Blender 4.x versus 5.x differences for these nodes. The Noise Texture roughness idea is our suggestion and is not in the manual.