
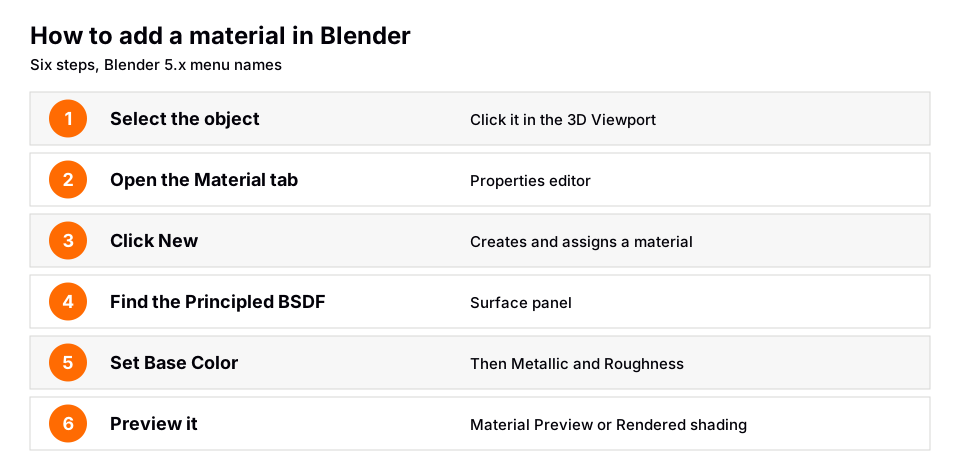
To add a material in Blender, select the object, open the Material tab in the Properties editor, click New, and then change the settings of the Principled BSDF that appears, starting with Base Color, Metallic and Roughness. A material is the data that tells Blender what an object is made of, including its color, texture and how light interacts with it.
This guide covers the six steps, the Shader Editor, how to put different materials on different parts of one mesh, how to reuse a material on other objects, and why a material sometimes does not show. It follows the Blender 5.2 LTS manual, so menu names are for Blender 5.x.
How to add a material in Blender
- Select the object in the 3D Viewport. The material goes on the active object.
- Open the Material tab in the Properties editor. The manual says materials can be created either in the Material properties or in the Shader Editor, and that both are views of the same shader nodes and material settings.
- Click New in the material data-block field. A new material is created and assigned to the object's material slot.
- Find the Surface panel and look at the shader it shows. The manual says physically based materials are built with the Principled BSDF, which can create plastic, glass, metal, cloth, skin, hair, smoke and fire.
- Set Base Color. The manual describes it as the overall color used for diffuse, subsurface, metal and transmission.
- Switch the 3D Viewport to Material Preview or Rendered shading. The default Shading workspace has a 3D Viewport that can use either, so you see how the material reacts to light as you change it.
You should now see a colored object that reacts to the lights or world in the viewport. If it is still gray, the viewport is probably in Solid shading, covered in the troubleshooting section below.
Where the same material lives in the Shader Editor
The Shader Editor edits the same material as a node tree. The manual says materials used by Cycles and EEVEE are defined using a node tree, so the main window of the Shader Editor is a node editor. The easiest way to see it is to open the Shading workspace, which has a Shader Editor beside a 3D Viewport.
In the Shader Editor header, the Shader Type menu chooses what you edit: Object edits the active object's material, World edits the world background, and Line Style edits Freestyle line styles. The Slot menu picks the active material slot, and the material selector beside it changes the material in that slot. The pin button keeps the current material visible even when you select something else.
The Sidebar's Options panel repeats the settings from the Material tab, so you can edit the whole material without leaving the Shader Editor. For how nodes connect, see Blender material nodes explained.
Sources: Shader Editor
The Principled BSDF settings to change first
The manual describes the Principled BSDF as one node that combines multiple layers and can model a wide variety of materials. For a first material, five inputs do most of the work.
| Input | What the manual says | Try |
|---|---|---|
| Base Color | Overall color used for diffuse, subsurface, metal and transmission | Pick any color |
| Metallic | Blends between a dielectric and a metallic model; 1.0 has no diffuse reflection or transmission | 0 for most things, 1 for bare metal |
| Roughness | 0.0 is a perfectly sharp reflection, 1.0 a diffuse one | Low for glossy, high for matte |
| IOR | Default 1.5; for most materials between 1.0 and 4.0 | Leave at the default |
| Alpha | Transparency of the surface; 1.0 is fully opaque | Leave at 1.0 unless you need see-through |
The "Try" column is our starting suggestion, not a value from the manual. Change one input at a time with the viewport in Material Preview so you can see what each one does. For specific looks, see metal materials in Blender and the Blender glass material guide. The manual notes that image textures painted or baked in other software can be linked straight to the matching Principled BSDF input, and how to add a texture in Blender shows the steps.
Sources: Principled BSDF
Put two materials on one object
By default an object has a single material slot, which assigns one material to the whole object. The manual's material assignment page describes how to give different faces different materials.
- In Object Mode, create the base material as above.
- Enter Edit Mode and choose face select. New buttons appear below the slot list: Assign, Select and Deselect.
- Select the faces for the second material.
- Click Add Material Slot or pick an existing slot, then choose or create the material for that slot.
- Click Assign. The material appears on the selected faces.
The manual points out that if you want a smooth transition between two materials instead of a hard edge, mixing shaders with a Mix Shader node is a better solution than separate slots.
Sources: material assignment page
Reuse a material on other objects
The manual says materials are data-blocks that can be assigned to one or more objects, so you do not need duplicates. There are two ways to reuse one.
- One object: select it and click the sphere icon to the left of the material name. A pop-up lists every material in the current blend-file. Click one to use it. The search field at the bottom filters by name.
- Many objects: select the objects, make the one that already has the material the active object, and press Ctrl+L in the 3D Viewport. The manual says this links all selected objects to the material of the active object.
To delete a material, click the X in the material list. The manual says a material with no real users and no Fake User is permanently deleted once you save and reload the file. If you want to keep an unused material, turn on its Fake User button. The Link setting has two choices: Data ties the material to the mesh and Object ties it to the object. Use Object if several objects share one mesh but need different materials.
Why the material is not showing
- The viewport is in Solid shading. Switch to Material Preview or Rendered. The manual lists a Viewport Display group in the Material tab (Color, Metallic, Roughness) that controls the Solid view separately from the nodes.
- The wrong slot is active. Check the slot list in the Material tab.
- Only some faces are assigned. Use Select in Edit Mode to see which faces belong to the active slot.
- The shader is not connected to the output. The Material Output node's Surface input must receive the shader.
The longer checklist is in Blender material not showing: the fix.
Skip the node wiring with the Material & Lighting Vault
Learning the Principled BSDF is worth it, but building every look from scratch is slow. The Material & Lighting Vault is a Blender 5.2+ extension (a Metalight tab in the N panel) with 1,690 procedural materials: 1,000 core materials in 32 categories plus 690 Pro. They work in Cycles and EEVEE and need no UVs, because they use object coordinates by default. A Use UV option exists if you want it. The full set totals about 64 MB.
It also has 67 weathering presets (rust, moss, snow, soot, cracks, edge wear) that work on any material, including the ones you make yourself. The Vault is a tool, not a course.
If you want to learn Blender in order first, The Blender Launchpad is a roadmap of hand-picked free YouTube lessons, with a first stage that assumes you have never opened Blender.
Questions people also ask
How do I add a material in Blender?
Select the object, open the Material tab in the Properties editor and click New. Then set Base Color, Metallic and Roughness on the Principled BSDF and check the result in Material Preview shading.
What is a material in Blender?
The manual says materials control the appearance of meshes, curves, volumes and other objects. They define what an object is made of, its color and texture, and how light interacts with it.
How do I add a second material to an object?
Add a material slot, go into Edit Mode, select the faces you want, pick the new material in the slot and click Assign.
How do I use the same material on several objects?
Select the objects, make the one with the material the active object, and press Ctrl+L in the 3D Viewport. You can also pick an existing material from the sphere icon next to the material name.
Is the material the same in Cycles and EEVEE?
Mostly. The manual says EEVEE shares the material node system with Cycles but not every feature is supported. Some Principled BSDF inputs, such as Thin Film and Anisotropy, are marked Cycles only.
How we checked this
We did not run Blender for this guide. We read these pages on November 4, 2026, and wrote only what they confirm:
- Blender Manual (5.2 LTS), read November 4, 2026: Materials introduction, material slots and assignment, Material Settings (Viewport Display), Shader Editor, Principled BSDF, EEVEE Material Settings, Material Output node.
We could not confirm from the manual the exact label of the button that creates a material in every layout, so we say New, as the Properties editor usually shows it. We did not compare Blender 4.x and 5.x screens for this topic.


